Let me tell you about the little miracle that is microwave caramels. Yes, you heard that right—microwave!
We stumbled upon this recipe when we were craving something sweet but didnt want to fuss around the
stove for an hour. And honestly, it was like magic the first time we tried t. Six minutes later, we had a
batch of buttery, meh-in-your-mouth caramels ready to devour (and a house sr-nelling like a candy shop).
What I love most about these caramels—aside from how ridiculously fast they are to make—is how
perfect they are for a quick treat or an easy gift idea. They’ve got that chewy, rich, golden-brown
goodness thatll make you wonder why you ever bothered with store-bought caramels. And if you’re
looking for sornething fun to make with the kids or a last-r-ninute party sweet, this ones for you.
Quick Tips Before You Start:
Make sure you use a large microwave-safe bowl. Trust n-æ on this—the mixture bubbles up, and you
don’t want it to overflow
Every microwave is a bit different, so you might need to adjust the cocking time. Keep an eye on the
caramel as it cooks—it should bubble up and turn a beautiful amber color.
And dot-ft worry if your caramels are a little soft or a little firm—it’s all about preference! They’ll still
taste incredible.
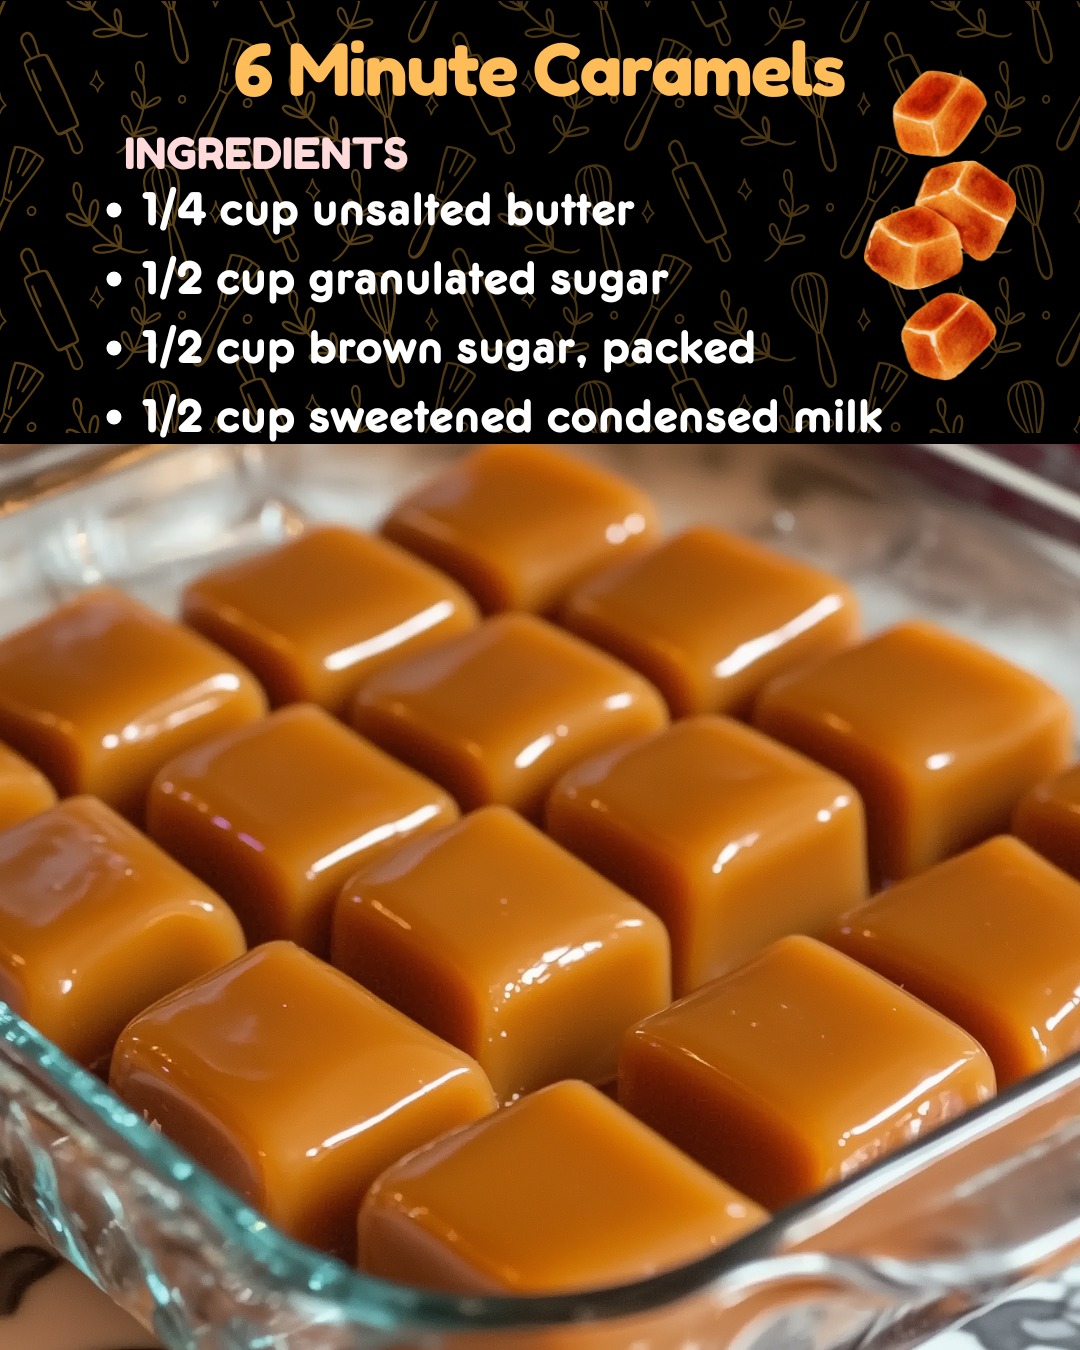
Ingredients
• hcup (1 stick) unsalted butter — Cut it into smaller pieces; this helps it melt evenly.
h cup com syrup — Keeps the caramels sr-nooth and chewy
• h cup sugar, packed — For that deep caramel flavor. Light or dark, you choose.
h cup granulated sugar — Balances out the brown sugar and adds that perfect sweetness-
• h cup sweetened condensed milk — The secret to creamy, dreamy caramels.
Pinch of sea salt — Optional, but if you like that sweet-sawy thing (who doesn’t?), sprinkle a bit in!
Optional Garnishes
• Flaky sea salt (for sprinkling on top—highly recomrnended!)
• Melted chocolate for dipping (because, why not?)
How to Make Microwave Caramels
Step 1: Mix It All Together
In a large microwave-safe bowl, mix together the butter, corn syrup, brown sugar, granulated sugar, and
sweetened condensed milk. Make sure to use a big bowl—remer-nber, this mixture will bubble up, and you
donh want any sticky overflow situation. Give it a good stir until everything’s combined. Oh, and a little
side note: don’t stress if the butter isnt fully melted—it will during the cooking process.
Step 2: Microwave Magic
Now here’s where the magic happens. Pop the bowl in the microwave and cook the mixture on for 6
minutes. Every microwave is a little different, so at around the 3-minute mMk, pause and give it a quick
stir It’ll be hot, so be careful! After that, pop it back in for the remaining time.
When it’s done, the caramel should be thick and bubbling, with that gorgeous golden-brown color. If it
looks a bit pale, feel free to add another 30 seconds to a minute. Just keep an eye cn it—you dont want
to burn it
Step 3: Pour, Cool, and Slice
Carefully (because, hot caramel!) pour the mixture into a greased or parchmalt-lined 8×8-inch baking
dish. You can also use a loaf pan if you want thicker caramels. Let it cool at room temperature for about
2 hours, or if you’re impatient like me, stick it in the fridge for 30 minutes to an hour to speed things up.
Once the caramel is firm enough to handle, lift it out of the pan, place it on a cutting board, and slice it
into bite-sized squares. I like to use a sharp knife or even kitchen scissors—whatever works best for you.
Step 4: Wrap and Store
If you’re planning to gift these or want to store them for a bit, wrap each piece in wax paper or parchment
paper. (l mean, if they make it that long—around here, they tend to disappear pretty quickly!)
Optional: Dress Them Up!
These caramels are pretty perfect as is, but if you’re feeling fancy.
SIXinkle flaky sea salt over the top before the caramel sets for that addictive saltysweet combo.
Dip them in melted ctwcolate and let them harden for a caramel-chocolate treat thars out of this
world.
Add a hint of vanilla extract (about 1 teaspoon) to the mixture before microwaving for a richer flavor.
Troubleshooting: What If It’s Too Soft or Too Hard?
So, here’s the thing: caramels are all about that perfect texture. If your caramels are a little on the soft
side, pop them in the fridge to firm up. If theyre too hard, don’t sweat it—they’re still delicious. You can
always adjust the microwave time on your next batch by a minute or so to get them just how you like
Storing Your Caramels
Store your caramels in an airtight container at room temperature for about 2 weeks (if they last that
long). They can also be kept in the fridge, but you’ll want to let them come to rcom temperature before
enjoying, or they’ll be a bit too firm to bite into.
These microwave caramels are the perfect treat for when you need something sweet, fast, and
hornemade. And honestly, theyre kind of addictive—we find ourselves making these on repeat, especially
around the holidays. If you make them, I’d love to hear how they turn out! Enjoy every chewy, sweet bite.